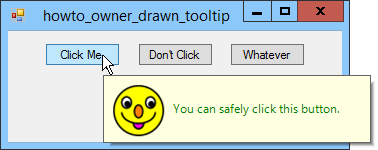
Like many common controls, the tooltip control supports custom drawing for maximum flexibility. This is a quick tutorial on how to use the tooltip custom draw facility.
First, start with the following scratch program (which is a slightly modified version of Raymond Chen’s scratch program):
|
|
Next, we’ll add a tooltip to this window. We’re not going to do anything fancy like tooltip multiplexing so we’ll use TTF_SUBCLASS.
|
|
If you compile and run the program, you should see a tooltip with the text “Hello World!” pop up.
To use custom draw, we must handle the NM_CUSTOMDRAW message. First we’ll write the WM_NOTIFY handler to forward the message to our function.
|
|
Now we’ll implement the custom draw function. For simplicity’s sake, we will simply write the text “Hello World!” just as the tooltip did before we used custom draw.
It is important to note that the tooltip control will continue to draw the static text even if we are using custom draw. To get around this problem, we’ll have the tooltip control draw the text in the same color as the background, effectively making it invisible.
|
|
We now can use the full range of GDI functions to render the content of the tooltip, including multiple fonts, lines, ellipses, etc. However, drawing is limited to the size of the tooltip’s client window, and this is determined based on the text passed to the tooltip window in OnCreate(). If we want to control the size of the tooltip, we must handle the TTN_SHOW message:
|
|
We now have a sizable, custom-drawable tooltip control.